Welcome to the Shark Rocket Vacuum User Manual, your comprehensive guide to understanding and optimizing your cleaning experience. This manual covers assembly, maintenance, troubleshooting, and key features to help you get the most out of your Shark Rocket Vacuum.
1.1 Overview of the Shark Rocket Vacuum Series
The Shark Rocket Vacuum Series offers a range of versatile and powerful cleaning solutions designed for modern households. With models like the Shark IX140, UV480, and HV302, this series caters to diverse cleaning needs, from pet hair to hard floors. Known for their lightweight designs and advanced features like DuoClean technology, these vacuums provide efficient cleaning with minimal effort. Whether you prefer cordless convenience or upright reliability, the Shark Rocket Series delivers superior performance and adaptability, making it a popular choice for homeowners seeking high-quality cleaning tools.
1.2 Importance of Reading the User Manual
Reading the Shark Rocket Vacuum User Manual is essential for maximizing your cleaning experience. It provides detailed insights into the product’s features, safety guidelines, and troubleshooting tips. Understanding the manual ensures proper assembly, operation, and maintenance, helping you avoid potential issues. It also highlights key functions like suction control and cleaning modes, enabling you to customize your cleaning routine. By following the manual, you can extend the lifespan of your vacuum and ensure optimal performance. Referencing the manual regularly helps you address common problems and makes the most of your investment in the Shark Rocket Vacuum.
1.3 Key Features of the Shark Rocket Vacuum
The Shark Rocket Vacuum is designed for versatility and efficiency, offering a lightweight and cordless design for effortless cleaning. It features DuoClean technology, combining two brush rolls to capture debris and dust on various surfaces. The self-cleaning brush roll prevents hair tangles, while LED lights illuminate hidden dirt. With multiple attachments, it adapts to different cleaning needs, from hard floors to upholstery. The vacuum also includes advanced suction control and a rechargeable battery for extended use. These features make it a powerful tool for maintaining a clean and dust-free home environment.
Safety Instructions
Always follow safety guidelines to ensure safe operation. Avoid overheating, keep children away, and prevent electrical hazards. Refer to the manual for detailed precautions and handling tips.
2.1 General Safety Precautions
Always read the manual before use to ensure safe operation. Avoid overheating by not blocking airflow or leaving the vacuum running unattended. Keep children and pets away while cleaning. Prevent electrical hazards by avoiding water exposure and using only Shark-approved chargers. Regularly inspect cords and plugs for damage. Never insert objects into openings or modify the vacuum. Use genuine Shark parts to maintain safety and performance. Follow guidelines for specific models like the Shark IX140 or UV480. Proper handling and storage are crucial to avoid accidents and ensure longevity of your Shark Rocket Vacuum.
2.2 Electrical Safety Guidelines
Use only the original charger provided with your Shark Rocket Vacuum to avoid electrical hazards. Ensure the vacuum is unplugged before cleaning or maintaining it. Avoid exposing the device to water or moisture, as this can cause electrical issues. Regularly inspect the power cord and plug for damage; do not use if damaged. Keep the vacuum away from flammable materials and avoid overheating. Store the charger in a dry, cool place. Follow all local electrical regulations and manufacturer guidelines for safe operation. Refer to your specific model’s manual, such as the Shark IX140 or UV480, for detailed electrical safety instructions.
2.3 Proper Usage and Handling
Always handle the Shark Rocket Vacuum with care to ensure optimal performance and longevity. Move the vacuum gently, avoiding heavy pressure, which can damage the motor or brush rolls. Use the vacuum on indoor surfaces only, as outdoor use may damage the device. Regularly empty the dustbin to maintain suction power and prevent clogs. Avoid vacuuming water or wet debris, as this can harm the electrical components. For models like the Shark IX140 or UV480, refer to your specific manual for handling instructions tailored to your device. Proper usage ensures efficient cleaning and extends the life of your vacuum.

Shark Rocket Vacuum Parts Diagram
The Shark Rocket Vacuum Parts Diagram illustrates the main components, including the motor, dustbin, filters, and brush rolls, helping you identify and understand each part for maintenance and troubleshooting.
3.1 Main Components of the Shark Rocket Vacuum
The Shark Rocket Vacuum consists of several key components, including the motor, dustbin, filters, and brush rolls. The motor powers the suction, while the dustbin collects debris. Filters ensure clean air expulsion and can be washed or replaced. Brush rolls, found in the cleaning head, agitate surfaces for effective dirt pickup. Additional components like the handle and wheels enhance maneuverability. Understanding these parts helps in proper assembly, maintenance, and troubleshooting, ensuring optimal performance and longevity of your Shark Rocket Vacuum.
3.2 Accessories and Attachments
The Shark Rocket Vacuum comes with a variety of accessories to enhance cleaning versatility. These include a crevice tool for tight spaces, an upholstery brush for fabrics, and a pet hair tool for removing stubborn pet dander. Additional attachments like the motorized brush roll and extension wand provide flexibility for different surfaces. These accessories are designed to tackle specific cleaning tasks, ensuring a thorough and efficient cleaning experience. Refer to your model’s manual for a full list of included attachments and optional accessories available for purchase to customize your cleaning routine.
3.3 Understanding the Control Panel
The control panel on your Shark Rocket Vacuum is designed for intuitive operation. It typically features a power button to turn the vacuum on and off, along with suction control buttons to adjust cleaning power. Some models include a mode indicator to show the current cleaning setting, such as hard floor or carpet mode. Additionally, there may be LED indicators for battery life or blockage alerts. Familiarize yourself with the layout to optimize your cleaning experience. Refer to your specific model’s manual for detailed instructions on using the control panel effectively. This ensures you can customize your cleaning sessions effortlessly.

Assembly and Setup
Assembly and setup of your Shark Rocket Vacuum are straightforward. Unbox, inventory parts, and follow step-by-step instructions for easy assembly. Charge the battery fully before first use.

4.1 Unboxing and Inventory of Parts

When you unbox your Shark Rocket Vacuum, carefully inspect the contents to ensure all parts are included. Typically, you’ll find the main vacuum unit, detachable battery, charger, crevice tool, upholstery brush, and dustbin. Refer to the manual’s parts diagram to verify each component. Check for any damage or missing items. Organize the accessories for easy access. Familiarize yourself with each part’s purpose before proceeding with assembly. This step ensures a smooth setup process and helps you understand how everything connects. Take your time to ensure everything is accounted for and in good condition.
4.2 Step-by-Step Assembly Instructions
Begin by attaching the handle to the main vacuum unit, ensuring it clicks securely into place. Next, install the battery by aligning it with the charging port and gently pressing until it locks. Attach the floor nozzle to the end of the handle, making sure it fits snugly. Connect any additional accessories, such as the crevice tool or upholstery brush, to the designated ports. Refer to the parts diagram for clarity. Once all components are properly fitted, your Shark Rocket Vacuum is ready for initial charging and use. Ensure all connections are secure before proceeding.
4.3 Initial Charging Requirements
Before first use, charge the Shark Rocket Vacuum for at least 4 hours using the provided charging dock. Plug the dock into a power outlet and place the battery on it. The indicator light will turn red during charging and green when fully charged. Ensure the battery is properly aligned with the dock’s contacts. Avoid overcharging, as it may reduce battery lifespan. Once charged, the vacuum is ready for operation. Refer to the manual for specific charging times and guidelines to maintain optimal battery performance and longevity.
Operating the Shark Rocket Vacuum
Press the power button to turn on the vacuum. Adjust suction power using the control panel. Navigate between cleaning modes for different surfaces and tasks efficiently.
5.1 Turning On and Off the Vacuum
To operate the Shark Rocket Vacuum, locate the power button, typically found on the handle. Press it firmly to turn the vacuum on. You may hear a slight hum as it activates. The vacuum will emit a gentle noise, indicating it’s ready for use. To turn it off, press the power button again. Ensure the vacuum is off before plugging or unplugging it. Some models may have an LED indicator that lights up when powered on. Always turn off the vacuum when not in use to conserve battery life and ensure safety.
5.2 Adjusting Suction Power and Settings
The Shark Rocket Vacuum allows easy adjustment of suction power to suit different cleaning tasks. Locate the suction control button on the handle or control panel. Press it to cycle through available settings, such as Eco, Normal, or Boost mode. An LED indicator may light up to show the selected mode. For lighter cleaning, use Eco mode, while Boost mode is ideal for deep cleaning or large debris. Adjust the settings based on floor type and cleaning needs for optimal performance. Ensure the vacuum is turned on before changing settings for smooth operation.
5.3 Navigating Different Cleaning Modes

The Shark Rocket Vacuum offers multiple cleaning modes to cater to various surfaces and tasks. Use the mode selection button on the handle or control panel to switch between settings. Eco mode is ideal for light cleaning on hard floors, while Normal mode suits everyday cleaning. Boost mode provides maximum suction for deep cleaning or large debris. Some models also feature a dedicated carpet mode for enhanced performance on rugs. Always check the floor type and debris size before selecting a mode to ensure optimal cleaning results and prolong the vacuum’s lifespan. Adjust modes as needed for different areas of your home.
Maintenance and Cleaning
Regular maintenance ensures your Shark Rocket Vacuum performs optimally. Empty the dustbin, clean or replace filters, and check brush rolls regularly to maintain efficiency and extend lifespan.
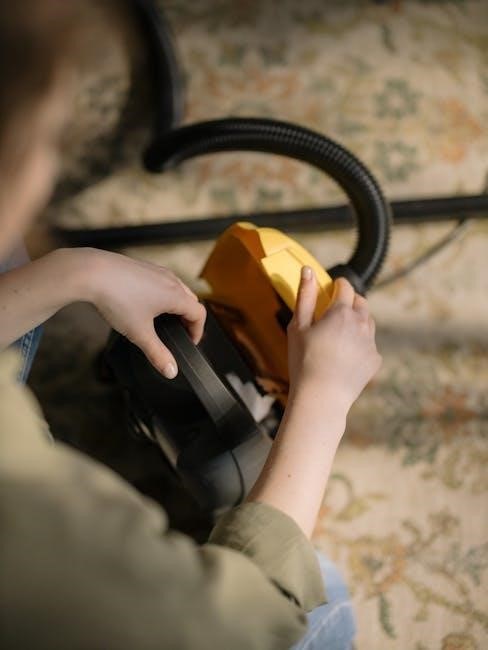
6.1 Emptying and Cleaning the Dustbin
To maintain your Shark Rocket Vacuum’s performance, regularly empty and clean the dustbin. Step 1: Detach the dustbin from the vacuum and dispose of its contents in a trash can. Step 2: Wash the dustbin with mild soap and warm water, ensuring no debris remains. Step 3: Allow it to dry completely before reattaching to prevent moisture buildup. Cleaning the dustbin helps prevent dust and allergens from recirculating and keeps your vacuum functioning efficiently. Regular maintenance ensures optimal suction power and a cleaner home environment. Always refer to your model’s specific manual for detailed instructions.
6.2 Washing and Replacing Filters
Regularly washing and replacing your Shark Rocket Vacuum’s filters is essential for maintaining its performance. Step 1: Check your user manual to identify washable filters. Step 2: Gently rinse them with mild soap and warm water, avoiding harsh chemicals. Step 3: Allow filters to air dry completely before reinstalling. Replace non-washable filters every 1-3 months or as recommended. Clean filters ensure optimal suction power and reduce allergens. For specific guidance, refer to your model’s manual. Proper filter maintenance enhances cleaning efficiency and prolongs the life of your vacuum. Always use genuine Shark replacement filters for best results.
6.3 Checking and Replacing Brush Rolls
Regularly inspect the brush rolls of your Shark Rocket Vacuum to ensure optimal performance. Step 1: Turn off and unplug the vacuum. Step 2: Remove the brush roll compartment according to your model’s instructions. Step 3: Clean hair and debris from the brush rolls using scissors or a cleaning tool. Step 4: Replace worn or damaged brush rolls with genuine Shark parts. For models like the Shark IX140, refer to the user manual for specific guidance. Proper maintenance prevents clogs and ensures efficient cleaning. Replace brush rolls every 6-12 months or as needed to maintain suction power and reduce tangles. Always follow safety precautions when handling internal components.
Troubleshooting Common Issues
Identify and resolve common problems with your Shark Rocket Vacuum, such as reduced suction, overheating, or battery issues, by following detailed solutions in this section.
7.1 No Suction or Reduced Suction Power
If your Shark Rocket Vacuum has no suction or reduced suction power, check for blockages in the hose, wand, or brush roll. Ensure the dustbin is empty and the filters are clean or replaced as needed. A clogged pre-filter or dirty filter can significantly reduce performance. Also, verify that the brush roll is free from hair or debris. If issues persist, consult the troubleshooting section for further guidance to restore optimal suction power and maintain peak cleaning efficiency.
7.2 Motor Overheating or Strange Noises
If your Shark Rocket Vacuum’s motor overheats or produces strange noises, first ensure there are no blockages in the hose, wand, or brush roll. Check for debris accumulation, as this can cause friction and overheating. Verify that the dustbin is empty and filters are clean or replaced. Strange noises may indicate loose parts or damaged components. Inspect the motor area for any obstructions or wear. If issues persist, turn off the vacuum, allow it to cool, and contact Shark customer support for assistance. Regular maintenance can prevent such problems and ensure smooth operation.
7.3 Battery Charging Problems
If your Shark Rocket Vacuum experiences battery charging issues, ensure the charger is properly connected to both the vacuum and a functioning outlet. Check for damage to the charger or battery contacts and clean them if necessary. Allow the battery to cool down if it’s overheated, as this can prevent charging. If the issue persists, reset the vacuum by turning it off and unplugging it for 30 seconds. If problems remain, contact Shark customer support for assistance or potential battery replacement. Regularly updating your vacuum’s firmware can also resolve charging-related issues.
Shark Rocket Vacuum FAQs
Find answers to common questions about your Shark Rocket Vacuum, including battery life, compatibility with different floor types, and filter maintenance, in this helpful section.
8.1 How Long Does the Battery Last?
The Shark Rocket Vacuum’s battery life varies depending on usage and settings. On average, it lasts between 20 to 40 minutes on a single charge. Factors like suction power, cleaning mode, and floor type can impact runtime. For larger spaces, consider purchasing an additional battery to extend cleaning sessions. Charging typically takes 3-5 hours for a full charge. Regular maintenance, such as cleaning filters, can also help optimize battery performance. Refer to your model’s specific manual for detailed battery care and charging instructions.
8.2 Can I Use the Vacuum on All Floor Types?
The Shark Rocket Vacuum is designed for versatility and can be used on various floor types, including hardwood, carpet, tile, and pet hair-prone areas. It features adjustable suction control and DuoClean technology, which captures debris on hard floors and digs into carpets. For optimal performance, switch between modes like hardwood, carpet, or pet hair settings. However, avoid using it on wet surfaces or delicate fabrics without proper attachments. Always test a small area first to ensure compatibility and prevent damage. Refer to your model’s manual for specific recommendations on floor type usage and attachment suggestions.
8.3 How Often Should I Clean the Filters?
Clean the Shark Rocket Vacuum filters regularly to maintain optimal performance. Check and rinse the filters every 1-2 weeks, or more frequently if you have pets or allergies. Remove the filters, rinse them under warm water until clean, and allow them to air dry completely before reinstalling. Never operate the vacuum without the filters in place, as this can damage the motor. Replace filters every 1-2 years or as recommended in your model-specific manual. Cleaning the pre-filter after each use can also enhance suction power and overall efficiency.

Shark Rocket Vacuum Model-Specific Manuals
Explore model-specific guides for Shark IX140, UV480, HV302, and HV380 vacuums, each offering detailed instructions tailored to unique features and setup requirements.
9.1 Shark IX140 Series Pet Cordless Stick Vacuum Manual
The Shark IX140 Series Pet Cordless Stick Vacuum Manual provides detailed guidance for this lightweight, portable cleaner. Designed for pet owners, it features advanced pet hair removal tools and a self-cleaning brush roll. The manual covers assembly, charging, and operation, along with maintenance tips for optimal performance. It also includes troubleshooting for common issues like reduced suction or battery life. With clear instructions and diagrams, this manual ensures users maximize their cleaning efficiency and extend the product’s lifespan. Perfect for pet-friendly homes, it offers solutions for allergens and embedded pet hair.
9.2 Shark UV480 Rocket Vacuum User Manual
The Shark UV480 Rocket Vacuum User Manual is a detailed guide for this powerful and versatile cleaner. It covers the DuoClean technology, self-cleaning brush roll, and advanced filtration system. The manual provides step-by-step instructions for assembly, operation, and maintenance, ensuring optimal performance. It also includes troubleshooting tips for common issues like clogs or reduced suction. With clear diagrams and concise language, this manual helps users master the UV480’s features, such as its lightweight design and multiple cleaning modes. Perfect for hard floors and carpets, it ensures a deeper clean with minimal effort.
9.3 Shark HV302 Rocket Vacuum Cleaner Manual
The Shark HV302 Rocket Vacuum Cleaner Manual offers a thorough guide for this lightweight and efficient cleaning tool. Designed for versatility, it covers the vacuum’s key features, such as its detachable handheld design and advanced filtration system. The manual provides clear instructions for assembly, operation, and maintenance, ensuring users can tackle various cleaning tasks with ease. It also includes troubleshooting tips for common issues and highlights the importance of regular filter cleaning and brush roll maintenance. With this manual, users can maximize the HV302’s performance and enjoy a cleaner home with minimal effort.
9.4 Shark HV380 Rocket Vacuum User Guide
The Shark HV380 Rocket Vacuum User Guide is tailored for this model, offering detailed instructions for optimal performance. It covers assembly, operation, and maintenance, ensuring users can effectively utilize its lightweight design and advanced filtration system. The guide includes troubleshooting tips and emphasizes regular maintenance, such as cleaning filters and checking brush rolls. Designed for ease of use, it helps users maximize the vacuum’s capabilities, providing a comprehensive resource for any cleaning task. This manual is essential for getting the most out of your Shark HV380 Rocket Vacuum.
Downloading the Shark Rocket Vacuum Manual
Download the Shark Rocket Vacuum manual as a PDF from Shark’s official website. This guide provides detailed instructions for setup, maintenance, and troubleshooting your vacuum effectively.
10.1 Finding the Correct Manual for Your Model
To find the correct manual for your Shark Rocket Vacuum, visit Shark’s official website and search by your model number. Models like the IX140, UV480, HV302, and HV380 have specific manuals available for download. Ensure you select the exact model to access accurate instructions. If unsure, refer to the product label or packaging for the model number. You can also use the website’s support page to navigate to your model’s dedicated section. This ensures you receive the most relevant guidance for your device.

10.2 Downloading the Manual as a PDF
Downloading the Shark Rocket Vacuum manual as a PDF is straightforward. Visit Shark’s official website and navigate to the “Support” or “Manuals” section. Enter your model number, such as IX140 or UV480, and select the appropriate manual. Click the “Download” button to save the PDF to your device. Ensure you have a PDF reader installed to view the file. This allows you to access instructions anytime, even without internet access. Save the file to a dedicated folder for easy reference and future use.
10.3 Printing the Manual for Future Reference
Printing the Shark Rocket Vacuum manual ensures easy access to instructions without needing a digital device. After downloading the PDF, open it in a PDF reader and select the print option. Choose your preferred printer and adjust settings for optimal readability. Consider printing in portrait orientation for clarity. Organize the pages in a binder or folder for quick reference. This physical copy is ideal for workshops or areas without digital access. Ensure the print quality is clear to avoid missing important details. A printed manual is a durable backup for long-term use and convenience.

Additional Resources
Explore Shark’s official website, customer support, and community forums for troubleshooting, FAQs, and model-specific guides to enhance your Shark Rocket Vacuum experience and resolve queries efficiently.
11.1 Shark Customer Support Contact Information
For assistance with your Shark Rocket Vacuum, contact customer support at 1-800-798-7398. Visit their official website at sharkclean.com for more resources. The manual also provides detailed contact information for troubleshooting and inquiries. Their support team is available to address any questions or concerns regarding your product. Ensure to have your model number ready for efficient assistance. This service is designed to help you maximize your vacuum’s performance and resolve any issues promptly.
11.2 Shark Official Website and Product FAQs
Visit the Shark official website at sharkclean.com for extensive resources, including product FAQs, troubleshooting guides, and detailed information on your Shark Rocket Vacuum. The website offers a dedicated section for FAQs, covering common questions about usage, maintenance, and troubleshooting. You can also find video tutorials and model-specific guides to enhance your cleaning experience. For specific queries, navigate to the “Support” or “FAQs” section. This resource ensures you have 24/7 access to expert advice and solutions, helping you maximize your vacuum’s performance and address any concerns efficiently.
11.4 Shark Community Forums and User Discussions
Engage with the Shark community forums to connect with fellow users, share tips, and solve common issues. These forums are a valuable resource for discussing your Shark Rocket Vacuum experiences, troubleshooting, and learning from others. Users often post detailed reviews, hacks, and solutions for specific models like the Shark IX140 and UV480. Participate in discussions to gain insights, address concerns, and stay updated on the latest features and accessories. Visit the Shark website to explore these forums and join the conversation for a more personalized and informed cleaning experience.