
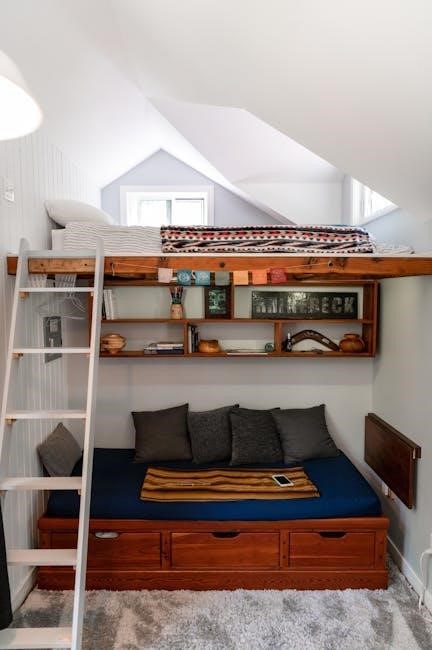
A blanket ladder is a stylish solution for organizing throws and quilts, offering a rustic charm. Simple to build, it’s perfect for beginners, providing functional and decorative storage.
What is a Blanket Ladder?
A blanket ladder is a decorative and functional storage solution for organizing throws, quilts, and blankets. Typically made of wood or metal, it features a tall, leaning design with horizontal rungs that hold folded blankets. Its simplicity and versatility make it a popular DIY project, offering a rustic charm to any room. It’s cost-effective, easy to build, and customizable to fit various spaces and styles. A blanket ladder is perfect for adding farmhouse or industrial aesthetics while keeping your home cozy and organized.
Benefits of Building a Blanket Ladder
Building a blanket ladder offers numerous benefits, including cost-effectiveness, customization, and functionality. It’s a budget-friendly project requiring minimal tools and materials, making it ideal for beginners. The ladder provides stylish storage for blankets and quilts, enhancing home décor with a rustic or industrial touch. Its compact design saves space, and the ability to customize size, material, and style ensures it fits seamlessly into any room. Additionally, it’s a quick project, often completed in under an hour, offering immediate satisfaction and practical use.

Materials and Supplies Needed
Essential materials include 2×4 lumber, screws, wood glue, and decorative hardware. Optional items like metal pipes or stain enhance customization, depending on your design preference.
Essential Tools
To build a blanket ladder, you’ll need basic woodworking tools. A saw or miter saw is essential for cutting lumber. A drill is necessary for screwing pieces together. Sandpaper or a sander ensures smooth surfaces. Measuring tape and clamps help with precise cuts and assembly. A Kreg Jig is useful for creating pocket holes. Safety gear, like gloves and goggles, protects during construction. A hammer may also be handy for tapping pieces into place. These tools ensure a sturdy and professional-looking blanket ladder;
Required Lumber
Building a blanket ladder requires specific lumber cuts. Typically, you’ll need 8-foot 2×4 boards for the sides and 2×2 or 2×3 boards for the rungs. Cut the side pieces to 6 feet long, angling the bottom for stability. Rungs are usually 18 inches each, spaced evenly for holding blankets. Some plans also use 1×3 furring strips for a slimmer look; Ensure all cuts are precise to fit together seamlessly. Cedar or pine are popular choices for durability and aesthetic appeal.
Additional Materials
Beyond lumber, you’ll need screws or wood glue for assembly. Decorative items like metal pipes or L-brackets can add a unique touch. Sandpaper is essential for smoothing edges, while wood stain or paint enhances the finish. Optional items include decorative caps for a polished look or metal rungs for an industrial feel. These materials ensure durability and a personalized aesthetic, making your blanket ladder both functional and stylish. Always choose high-quality fasteners for a sturdy structure.

Step-by-Step Guide to Building a Blanket Ladder
Cut the wood, distress, and sand for a rustic look. Assemble the ladder by attaching rungs, ensuring stability. Follow simple steps to create a functional display for blankets and quilts.
Step 1: Cutting the Wood
Cut two side pieces from 2×4 lumber, each 6 feet long, and five rungs from 2×3 lumber, each 18 inches long. Sand the cut edges for smoothness. For stability, cut one end of the side pieces at a 5-10 degree angle. Ensure precise measurements for even spacing and alignment. Use a saw and sandpaper to achieve clean cuts and edges; This step sets the foundation for a sturdy and visually appealing blanket ladder. Proper cutting ensures the ladder assembles seamlessly.
Step 2: Distressing and Sanding
Distress the wood for a rustic look by lightly hammering edges or using a distressing tool. Sand all pieces, focusing on corners and ends, to ensure smooth surfaces. Start with coarse-grit sandpaper and finish with fine-grit for a polished feel. This step enhances the ladder’s aesthetic appeal and prevents splinters. Proper sanding ensures a professional finish and prepares the wood for staining or painting. A well-sanded surface is crucial for durability and visual harmony in your home decor.
Step 3: Assembling the Ladder
Begin by attaching the rungs to the side pieces using wood glue and clamps. Ensure the rungs are evenly spaced and aligned for a balanced look. Use screws or nails to secure the joints, reinforcing the structure for stability. Allow the glue to dry completely before handling. Sand any rough edges post-assembly for safety. Double-check the ladder’s sturdiness and alignment before use. Proper assembly ensures durability and functionality, making your blanket ladder both attractive and reliable for storing throws and quilts.
Customization Ideas
Add a personal touch with paint, stains, or distressing. Incorporate metal pipes for an industrial look or adjust rung spacing for a unique display.
Adjusting the Angle and Rung Spacing
Customizing the angle and rung spacing enhances functionality and aesthetics. Cutting the bottom pieces at a 5-10 degree angle improves stability. Adjusting rung spacing allows for various blanket sizes. For a modern look, wide rungs and narrow uprights create visual appeal. These tweaks ensure your ladder fits seamlessly into any decor while maintaining its practical purpose of storing quilts and throws neatly.
Adding a Rustic or Industrial Touch
For a rustic or industrial look, combine wood with metal pipes or accents. Distressing the wood with cuts or sanding creates a weathered feel. Metal pipe rungs add an industrial edge, requiring precise hole drilling. Staining or painting enhances the aesthetic. These elements blend modern functionality with timeless charm, offering a unique, customizable storage solution for blankets that complements any home decor while maintaining practicality and style.

Safety Tips and Troubleshooting
Ensure ladder stability on level ground. Sand all edges for safety. Check joints for secure attachment. Avoid overloading with too many blankets.
Common Issues and Solutions
One common issue is instability due to uneven ground. To fix this, ensure the ladder is placed on a level surface or add non-slip pads. Another problem is loose rungs, which can be secured with additional screws or wood glue. If the ladder leans too much, adjust the angle of the legs during assembly. Properly sanding the wood can prevent splinters, ensuring a smooth finish. Addressing these issues will ensure your blanket ladder remains sturdy and functional.
Advanced Techniques for Experienced DIYers
Experienced DIYers can elevate their blanket ladder by incorporating metal pipes for an industrial look or creating unique designs with angled cuts or decorative finishes;
Incorporating Metal Pipes
Incorporating metal pipes into your blanket ladder adds an industrial touch. Use metal flanges and pipes to create a sturdy frame. This method offers durability and a modern aesthetic. Combine with wood for a rustic-industrial look. Ensure proper measurement and alignment for stability. Metal pipes can be sourced from hardware stores and require basic tools like a drill and wrench. This technique suits experienced DIYers looking for a unique design. Sand and finish the wood for a polished appearance.
Creating a Unique Design
Personalize your blanket ladder by experimenting with unique designs. Adjust the angle for a leaning or upright style, or vary rung spacing for a custom look. Use contrasting wood stains or paints to match your home decor. Consider adding decorative embellishments like carved details or metal accents. For a rustic feel, distress the wood before assembling. You can also modify the size to fit specific spaces or needs. These creative touches ensure your blanket ladder is both functional and a one-of-a-kind decorative piece.
A blanket ladder adds charm and functionality to any room. With these simple plans, you can create a stylish storage solution. Give it a try today!
Final Thoughts and Encouragement
Building a blanket ladder is a simple yet rewarding project that enhances your home’s decor. With minimal tools and materials, it’s an affordable way to add rustic charm. Whether you’re a beginner or an experienced DIYer, this project offers creative freedom. Customize it to fit your style, and enjoy the satisfaction of creating something functional and beautiful. Don’t hesitate to give it a try—it’s a perfect way to organize your blankets while adding a personal touch to your space.
Leave a Reply
You must be logged in to post a comment.