Mamaroo Instruction Manual: A Comprehensive Guide (Updated 03/31/2026)
Welcome! This comprehensive guide unlocks the full potential of your Mamaroo, offering detailed instructions for safe and enjoyable use, starting today, March 31st, 2026.
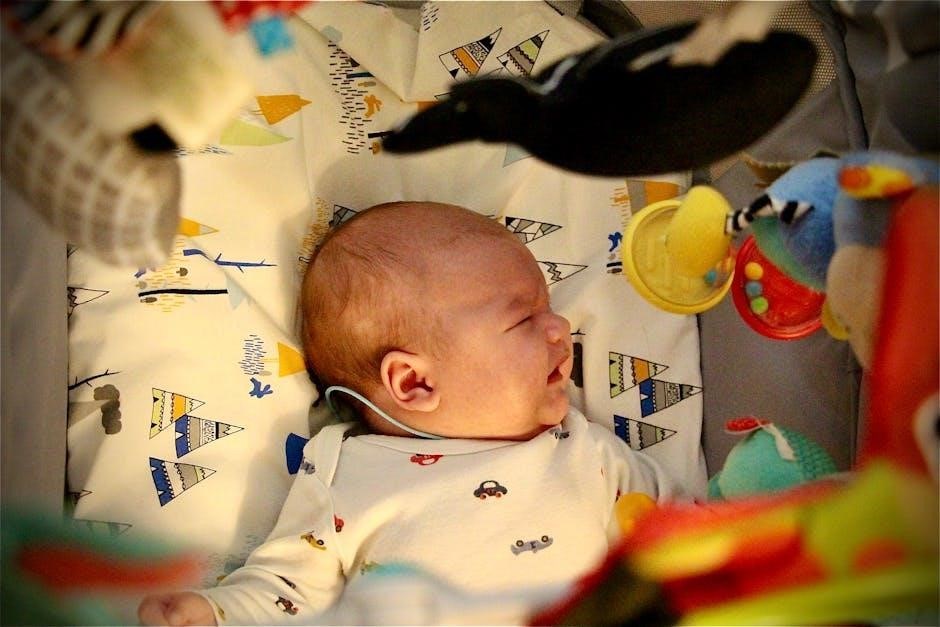
Welcome to the world of the Mamaroo! This innovative baby swing is designed to mimic the natural movements parents use to soothe their little ones. Unlike traditional swings, the Mamaroo offers a unique bouncing and swaying motion, providing a calming and engaging experience for your baby.
The Mamaroo isn’t just a swing; it’s a smart soothing system. It features customizable movement modes, built-in sounds, and Bluetooth connectivity for app control. This allows you to tailor the experience to your baby’s preferences, offering a personalized comfort solution.
This instruction manual will guide you through every step, from unboxing and assembly to operation and maintenance. We’ll cover safety precautions, detailed explanations of each feature, and troubleshooting tips to ensure a seamless and enjoyable experience for both you and your baby. Get ready to discover a new level of soothing with the Mamaroo!
What’s in the Box? ⎻ Component Checklist
Before you begin assembling your Mamaroo, please verify that all components are present. This ensures a smooth and hassle-free setup process. Your Mamaroo package should include the following:
- Motor Base: The core of the Mamaroo, providing all the soothing motions.
- Fabric Seat: The comfortable and washable seat for your baby.
- Seat Recline Adjusters: Components used to modify the seat’s angle.
- Power Adapter: For powering the motor base (check voltage compatibility).
- Toy Bar (Optional): Some models include a removable toy bar for added engagement.
- Instruction Manual: You are currently reading it!
Carefully unpack each item and inspect for any damage. If any components are missing or damaged, please contact our customer support team immediately for assistance. Retain the original packaging for potential returns or warranty claims.
Safety Precautions & Warnings
Important Safety Information: Always prioritize your baby’s safety when using the Mamaroo. Never leave your child unattended while in the bouncer. Utilize the provided safety harness at all times, ensuring a snug but comfortable fit. Regularly inspect the product for any signs of wear and tear, immediately discontinuing use if damage is detected.

Position the Mamaroo on a flat, stable surface, away from stairs, hazards, and cords. Do not place near water or heat sources. Adhere strictly to the maximum weight limit and age recommendations (detailed in the following section). Avoid modifying the Mamaroo in any way, as this could compromise its safety features.
Supervision is key – even with all safety features engaged.
Maximum Weight Limit & Age Recommendations
Crucial Usage Guidelines: The Mamaroo is designed for infants meeting specific weight and developmental criteria. The maximum weight limit is 20 pounds (9.07 kg). Exceeding this limit can compromise the bouncer’s stability and safety mechanisms, potentially leading to injury.
The Mamaroo is suitable for use from birth until your baby can sit up unassisted, typically around 6 months of age. However, this varies significantly between infants. Always assess your baby’s individual developmental stage before each use. If your baby attempts to climb out, discontinue use immediately.
Do not use the Mamaroo if your baby shows signs of rolling over while unrestrained. Regularly monitor your baby’s growth and adjust usage accordingly. Prioritize safety above all else.

Supervision Requirements
Constant Vigilance is Key: Never, under any circumstances, leave your baby unattended while using the Mamaroo. Active and consistent adult supervision is absolutely essential at all times. Even with the integrated safety features, a responsible caregiver must remain within close proximity to observe the infant.

Be particularly attentive during the initial uses as your baby adjusts to the motions. Regularly check the harness and ensure it’s securely fastened, but not overly tight. Avoid placing the Mamaroo near stairs, furniture, or any potential hazards.
The Mamaroo is not intended to replace a caregiver’s attention. It’s a helpful tool, but responsible supervision remains paramount for your baby’s safety and well-being. Prioritize your baby’s security above all else.
Assembling Your Mamaroo
Let’s Get Started! Assembling your Mamaroo is a straightforward process designed for quick and easy setup. Begin by carefully unpacking all components, referencing the ‘What’s in the Box?’ checklist to ensure everything is present. Lay out the motor base on a flat, stable surface, protecting it from scratches.
Next, locate the fabric seat. This will attach directly to the motor base via a secure connection point. Ensure the seat clicks firmly into place, verifying a stable and locked position; Double-check this connection before each use.
Finally, inspect all connections for tightness and stability. A properly assembled Mamaroo will feel solid and secure. Refer to the diagrams included for visual guidance if needed.
Attaching the Fabric Seat
Secure & Comfortable! Begin by identifying the designated attachment points on both the fabric seat and the motor base. These are typically located at the seat’s upper corners and correspond to receiving slots on the base. Align these points carefully.

Gently but firmly press the fabric seat downwards onto the motor base, ensuring the attachment points fully engage. You should hear a distinct ‘click’ sound indicating a secure connection. If you don’t hear the click, readjust and try again – do not force it.
Once attached, gently tug on the seat to confirm it’s locked in place. It should not wobble or detach easily. Regularly inspect the connection before each use to maintain safety and stability. A properly secured seat is crucial for your baby’s comfort and security.
Connecting the Motor Base
Powering Up! Before connecting the motor base, ensure the power outlet is easily accessible and meets the voltage requirements specified on the base’s label. Locate the DC power jack on the rear of the motor base.
Carefully insert the provided power adapter plug into the DC power jack. A snug fit is essential for reliable operation. Then, plug the power adapter into the wall outlet. You should see a small indicator light illuminate on the base, confirming power is flowing.
Avoid using extension cords or power strips, as they can potentially interfere with the power supply. Always disconnect the power adapter when the Mamaroo is not in use or during cleaning. Regularly check the power cord for any signs of damage.
Understanding the Control Panel
Navigating the Controls! The Mamaroo’s control panel is intuitively designed for effortless operation. At its core, you’ll find the power button, initiating and terminating all functions. Adjacent to this is the movement selection dial, allowing you to cycle through Bounce, Sway, and Wave modes – or combine them!
Dedicated plus and minus buttons control the intensity of the chosen movement, offering five adjustable levels. A separate set of buttons manages the built-in sounds; volume up, volume down, and sound selection. The Bluetooth pairing button enables connectivity with the Mamaroo app for expanded control.
An indicator light displays the current power status, while another signals Bluetooth connection. Familiarize yourself with each button’s function for a seamless experience.
Mamaroo Movement Modes Explained
Discover the Motions! The Mamaroo boasts three unique movement modes designed to soothe and entertain your little one. Bounce Mode mimics the gentle up-and-down motion of a parent’s embrace, offering a classic comforting rhythm. Sway Mode provides a side-to-side motion, reminiscent of cradling, promoting relaxation and sleepiness.
Wave Mode combines both bouncing and swaying, creating a multi-dimensional movement that closely resembles a parent’s natural movements while holding and comforting a baby. Each mode features five adjustable intensity levels, allowing you to customize the motion to your baby’s preference.

Experiment with different modes and intensities to find what best suits your baby’s mood and needs. The Mamaroo’s versatility ensures a calming experience for every child!
Bounce Mode – Features & Adjustments
Classic Comfort! Bounce Mode on your Mamaroo replicates the familiar, comforting up-and-down motion parents instinctively use to soothe their babies. This mode is excellent for calming fussiness and providing a gentle, rhythmic experience. The intensity of the bounce is fully adjustable, offering five distinct levels to cater to your baby’s individual preferences.
Personalize the Motion! To adjust the bounce, use the control panel’s “+” and “-” buttons while in Bounce Mode. Start with the lowest setting and gradually increase until you find a level that effectively soothes your little one. Observe your baby’s reaction – a relaxed demeanor indicates the perfect bounce intensity. Remember, consistency can be key!
Sway Mode – Features & Adjustments
Gentle Relaxation! Sway Mode mimics the soothing side-to-side motion often used during cuddling. This mode is ideal for creating a calming atmosphere, promoting relaxation, and encouraging peaceful naps. The Mamaroo’s Sway Mode offers a remarkably natural and fluid movement, designed to replicate a parent’s gentle swaying embrace.
Customize the Experience! Similar to Bounce Mode, Sway Mode features five adjustable intensity levels. Utilize the control panel buttons to fine-tune the sway to your baby’s liking. Begin with a subtle sway and incrementally increase the speed until you observe a calming response. Pay attention to your baby’s cues; a contented gaze suggests optimal comfort. Experiment to discover what works best!
Wave Mode – Features & Adjustments
Multi-Directional Motion! Wave Mode introduces a unique, combined movement – a blend of both bounce and sway, creating a more dynamic and engaging experience for your little one. This mode simulates the feeling of being carried, offering a comforting and stimulating sensation. It’s perfect for babies who enjoy varied motion and can help soothe fussiness.
Personalize the Rhythm! Like the other modes, Wave Mode provides five adjustable speed settings. Use the control panel to select the intensity that best suits your baby’s mood. Start with a lower setting and gradually increase it, observing your baby’s reaction. The Wave Mode is designed to be captivating, but always prioritize your baby’s comfort and adjust accordingly.
Combining Movement Modes
Unlock Dynamic Soothing! The Mamaroo truly shines with its ability to combine movement modes. Experimenting with different combinations – Bounce & Sway, Bounce & Wave, or Sway & Wave – allows you to discover the perfect motion to calm and entertain your baby. This feature caters to evolving preferences as your little one grows.
Customization is Key! To combine modes, simply select one mode, adjust its speed, and then add another. The Mamaroo seamlessly blends the motions, creating a unique rhythm. Observe your baby closely to identify which combinations they respond to most positively. Remember, each baby is different, and finding the ideal blend may require some trial and error. Enjoy the flexibility!
Bluetooth Connectivity & App Control
Seamless Control at Your Fingertips! Your Mamaroo boasts Bluetooth connectivity, enabling control via our dedicated mobile app (available on iOS and Android). Download the app and follow the simple pairing instructions to connect your device. Once connected, you gain access to a wider range of features and customization options.
Remote Adjustments & Presets! The app allows you to remotely adjust movement speed, recline position, and sound volume. Create and save custom movement ‘presets’ tailored to your baby’s preferences. You can also monitor the Mamaroo’s status and receive helpful tips. Enjoy the convenience of controlling your Mamaroo from anywhere within Bluetooth range – perfect for multitasking!
Adjusting the Seat Recline
Finding the Perfect Angle for Comfort! The Mamaroo features multiple recline positions to accommodate your baby’s needs, from upright playtime to relaxed lounging. To adjust the recline, locate the recline lever situated on the right side of the motor base (when facing the seat). Gently squeeze the lever and simultaneously adjust the seat back to your desired angle.
Secure Locking Mechanism! Release the lever to securely lock the seat in place. Always ensure the recline is firmly locked before use. We recommend starting with a fully reclined position for newborns and gradually increasing the incline as your baby gains head control. Regularly check the locking mechanism to guarantee continued safety and stability during operation.

Using the Built-in Sounds

Soothing Sounds for Your Little One! The Mamaroo boasts a selection of five built-in sounds designed to calm and entertain your baby. These include white noise, rain, ocean, fan, and shushing sounds. To activate the sounds, press the sound button on the control panel – each press cycles through the available options.
Personalized Audio Experience! Continue pressing to increase the volume to your preferred level. A long press on the sound button will turn the sound feature off. The built-in sounds are designed to complement the Mamaroo’s motions, creating a truly immersive and soothing experience for your baby. Experiment with different sound combinations to discover what best suits your little one’s preferences!
Volume Control & Sound Options
Precise Audio Adjustment! The Mamaroo’s volume control is intuitively integrated into the sound activation process. Short presses of the sound button after initial activation cycle through four distinct volume levels – low, medium, high, and mute. Visual indicators on the control panel display the current volume setting, ensuring easy monitoring.

Diverse Soundscape! Beyond the built-in options (white noise, rain, ocean, fan, and shush), the Mamaroo offers Bluetooth connectivity for streaming audio from your preferred device. This allows for a virtually limitless range of sound options, from lullabies to podcasts. Remember to pair your device following the Bluetooth connectivity instructions. Always ensure the volume is set at a safe level to protect your baby’s sensitive hearing.
Cleaning & Maintenance
Maintaining a Hygienic Environment! Regular cleaning ensures a safe and comfortable experience for your little one. Before any cleaning, always disconnect the motor base from the power source. The longevity of your Mamaroo depends on proper upkeep and diligent care.
Simple Procedures! Dust the motor base with a soft, dry cloth. Avoid using abrasive cleaners or immersing the base in water. For the fabric seat, refer to the dedicated ‘Fabric Seat Cleaning Instructions’ section for detailed guidance. Periodic inspection of all components is recommended to identify any wear and tear. Addressing minor issues promptly prevents larger problems. Consistent maintenance guarantees optimal performance and extends the life of your Mamaroo.
Fabric Seat Cleaning Instructions
Keeping the Seat Fresh! The fabric seat is designed for easy cleaning to maintain a hygienic environment for your baby. Always remove the fabric seat from the motor base before cleaning. Most spills can be gently blotted with a damp cloth and mild detergent.
Detailed Steps! For more stubborn stains, hand wash the fabric seat in cool water with a gentle baby-safe detergent. Do not machine wash or tumble dry, as this may damage the fabric and internal components. Air dry the seat completely before reattaching it to the motor base. Regular cleaning prevents the buildup of bacteria and ensures a comfortable experience. Inspect the seams regularly for any signs of wear or damage.
Motor Base Cleaning Instructions
Maintaining the Motor! To ensure the longevity and proper function of your Mamaroo’s motor base, regular cleaning is essential. Always unplug the motor base from the power outlet before commencing any cleaning procedures. Use a slightly damp, non-abrasive cloth to wipe down the exterior surfaces.
Important Precautions! Never immerse the motor base in water or any other liquid. Avoid using harsh chemicals or abrasive cleaners, as these can damage the plastic and electronic components. Pay particular attention to cleaning around the power cord and connection points. Ensure the motor base is completely dry before plugging it back in. Regular dusting will prevent buildup and maintain optimal performance. Inspect the cord for damage regularly.
Troubleshooting Common Issues
Addressing Problems! If your Mamaroo isn’t functioning as expected, begin by verifying the power connection and ensuring the unit is switched on. No Movement? Check the power adapter and outlet. If the control panel isn’t responding, try resetting the unit by unplugging it for 60 seconds, then plugging it back in.
Sound Issues? Confirm the volume is turned up and the desired sound is selected. Bluetooth Connectivity? Ensure Bluetooth is enabled on your device and the Mamaroo is in pairing mode. If problems persist, consult the FAQ section or contact customer support. Never attempt to disassemble or repair the motor base yourself; this will void the warranty. A full reset often resolves software glitches.
Warranty Information & Customer Support
Protecting Your Investment! Your Mamaroo is covered by a one-year limited warranty against manufacturing defects, starting from the original purchase date. This warranty doesn’t cover normal wear and tear, misuse, or accidental damage. Need Assistance? Our dedicated customer support team is available to help!
You can reach us via phone at 1-800-MAMAROO (1-800-626-2766) or email us at support@mamaroo.com. Visit our website, www.mamaroo;com, for a comprehensive FAQ section, troubleshooting guides, and warranty claim submission. Please have your proof of purchase readily available when contacting support. We are committed to ensuring your complete satisfaction with your Mamaroo. For international support, please check our website for localized contact information.
Frequently Asked Questions (FAQ)
Q: Can I use the Mamaroo from birth? A: While the Mamaroo is fantastic for older babies, newborns require additional head and neck support. Always consult your pediatrician before using with a newborn. Q: How often should I clean the fabric seat? A: We recommend washing the fabric seat weekly, or more often if needed, following the cleaning instructions in this manual.
Q: The motor is making a strange noise. What should I do? A: First, ensure the motor base is on a level surface. If the noise persists, contact customer support. Q: Is the Mamaroo portable? A: Yes, the Mamaroo is designed to be relatively portable, but always ensure it’s securely set up before use. For further questions, visit our website’s FAQ section!